Confused as to which mastering technique is the best for your designs?
Here are a few thoughts that might help you to decide.
We produce around 1,000 new masters per month! That’s a lot of work, and due to the huge variation in the items we produce we use a wide variety of master making techniques, and skills! I write skills here to as for some items there is no better way than using a skilled artisan or craftsman to get the best results. We have some incredibly skilled traditional hand carvers here, working with a range of materials besides conventional waxes. Some prefer carving in wood, bone, or even horn to get the best results, depending on the item, and the skills of the carver, really it all comes down to how we can get the best result. It is a real luxury to have so of these wonderful but non-traditional (in the jewelry making sense!) skills available to combine with the more standard master making techniques.

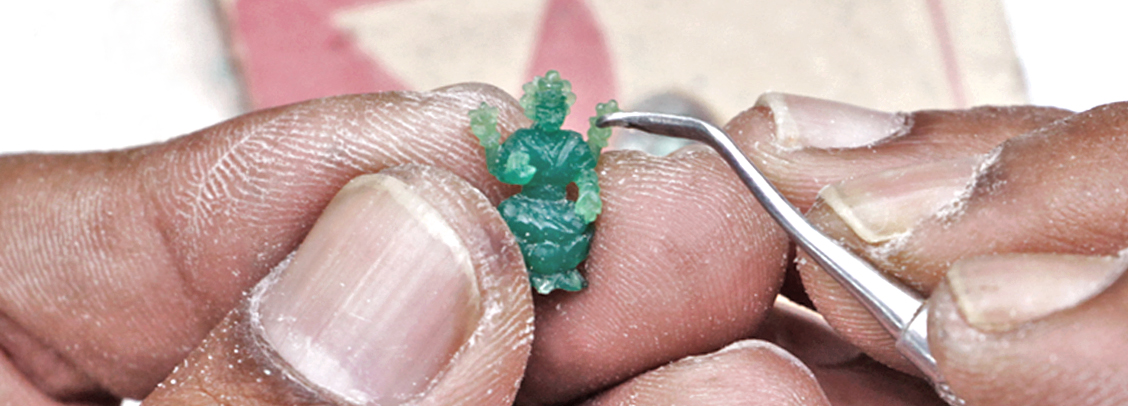
We get a lot of requests from customers for designs of mythological animals or deities, or items with ornate filigree and scroll work, etc… For these kinds of ‘organic’ designs the flowing hand of a skilled hand carver usually gives the best results, and in this situation this method is generally cheaper and faster than using standard industrial methods.
For items where straight lines or perfect curves are important then CNC milling will usually give the best result. Milling also can give great results for calibrated stone settings and pave designs. It is also a good choice when the required working envelope is large. We find it very useful for making larger non-jewelry masters, such as for furniture or bag hardware, and also homeware items. CNC often is not the best choice for spherical models, but if models have a flat base or back it is generally the best option to take.

Which brings us to 3D printing, a technology that is revolutionizing jewelry manufacturing and will continue to do so. Currently it is not cost effective to directly 3D print items for production; that day will come, but for now it is a great master making technology offering many benefits. It is very accurate (currently we are printing at 25 microns, that is an accuracy of 0.025 mm! For reference a sheet of regular paper is around 100 microns so this is 1/4 the thickness of a sheet of paper!), and it is fast and flexible. The most important and time consuming part of 3D printing is actually drawing your design in a 3d program (matrix and rhino being the most common), but there is a big benefit if you are doing a range of designs using the same component, but for example in different sizes, as you can resize your diagram, very quickly, cheaply and easily for subsequent components, or if slight modifications are required you can take, for example the design for a pendant and attach it to a ring base. A huge advantage of 3d printing is that you can make a rendering which will give you a very accurate visual which you can view on your screen, print and or share with your customers and colleagues: this allows for good feedback, and the possibility for revisions before you actually create your master. Many programs also have standard pre-set features which allow you get correct sizes on rings, accurate and automatic suggestions for prong positions for stone setting etc… This is super useful and a massive saving on designer time. Another feature too is that it can get accurate estimates of metal weight before going to print so you can see that your final item will meet your budget.


An interesting thing we are doing now is mixing 2 or more mastering techniques on a single master. An example of this would be say if we were making a master of the Hindu deity Saraswati, with pave set stones in the tiara, we may choose to hand carve the body but incorporate a printed wax of the tiara into this hand carved master so that we get better stone setting results, Mixing techniques like this expands on your creative options and it is fun to explore.
Lastly though we should always remember that the objective here is to find the fastest, cheapest, and most accurate result, and sometimes it can be really simple! As an example we have just this week made a new master of a flat 1mm thick 5 pointed star, with the customers logo on the back, and to make this we took some metal plate 1mm thick, drew the shape from a template on the sheet, hand cut it out and laser marked the logo on the back, and hey presto in 30 minutes and for a few dollars we had the perfect master!
If you have any further questions, thoughts or ideas about mastering you would like to pursue, please contact me ben@kapitmas.com, or if you would like to produce some masters with us, please contact one of our experienced customer services team, you will find their details on our website, and they can advise you on the best way to master your designs to create the best outcome.

Many good wishes,
Ben
